Contact Us

Use the form on the right to contact us.

You can edit the text in this area, and change where the contact form on the right submits to, by entering edit mode using the modes on the bottom right. 


123 Street Avenue, City Town, 99999

(123) 555-6789

email@address.com


You can set your address, phone number, email and site description in the settings tab.
Link to read me page with more information.

CONTENT

Filtering by Tag: RECIPE

The Art to Scone Making

Ben Ashby

THE ART OF SCONE MAKING


By: Debbie Anderson || The Scone Lady

Photography: Kimberly Taylor


Walk into a tearoom in the UK and order a scone, and you will be given three options —plain, sultana (with golden raisins), or cheese.  Google “scones” here in the US, and you will find that the flavor options are limitless.  There are recipes for everything from the traditional plain (or cream) scone to a wide and creative variety including blueberry, cranberry, pumpkin, gingerbread and countless other flavors and combinations.  We Americans have taken the traditional British teatime treat and added our own unique twists and creativity to that simple little quick bread.

When I first started baking scones, I began by working my way through a book of scone recipes.  Each recipe was specific to a particular flavor of scone and seemed to require significantly different ingredients than the previous recipe.  It actually became fairly annoying to have to go on a search through the pantry to find out if I had all the ingredients needed to bake a particular flavor of scone.  Many, many of those early scone-baking sessions resulted in the neighborhood birds and squirrels enjoying a scone feast—for countless recipes resulted in dry and tasteless scones.  


As I became more adept at scone baking, I began to understand that the secret to flavor variety was not going to be found in a cookbook of 100 different scone recipes.  Rather, the key was to find a good base (plain) scone recipe (or scone mix) and then learn how to adapt that scone into a multitude of flavors.  If the plain scone wasn’t good—then no amount of additions and toppings were going to improve its flavor.  

And so the quest began. I finally found a scone recipe which met all of my criteria for the perfect scone, and over time I learned how to change it to create distinctly different flavors.  Sometimes that adaptation was born of necessity—I can’t tell you how often I stood in front of the pantry frustrated that I was out of sugar—or chocolate chips—but I had brown sugar on hand, or canned pumpkin—and suddenly a new flavor was born.  It does help, I learned, to have completely honest and captive guinea pigs—in my case, my then-teenage children and their friends, who were always in and out of the house and more than willing to sample a new scone flavor. 

I have learned a few things over the years—and made a lot of mistakes as well.  I was convinced that there was no mistake anyone could make that I haven’t already made—until one of my customers (a Bed and Breakfast owner) confessed that she set her oven on fire one morning while baking strawberry scones (and sent her husband down the street for an emergency bakery run!).  


Creating a different flavor of scone is really pretty simple—as long as you follow a few basic principles of baking.

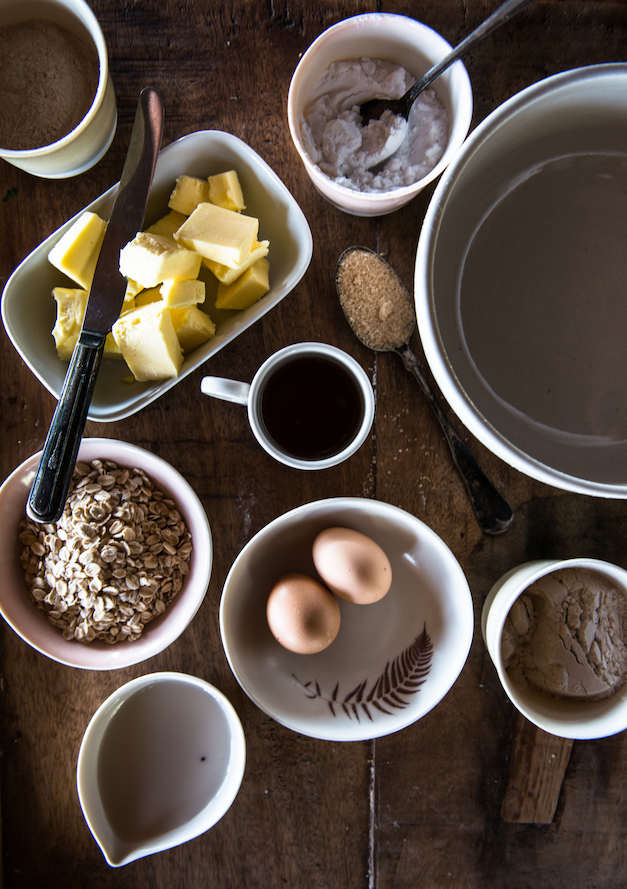
Keep the total volume of liquid the same as what is called for by the recipe or mix directions For example—suppose you want to make a pumpkin flavor scone, and plan to add some pumpkin puree to the scone recipe.  The puree behaves like a liquid—so you will need to cut back on the liquid called for in the recipe, and replace that liquid with pumpkin puree.  If the recipe calls for 1C liquid, and you want to add 1/2C pumpkin puree, then spoon the ½ C of puree into your measuring cup and then bring the total volume up to 1C with the liquid called for in your recipe (usually cream/buttermilk/milk).  Stir to blend completely, and use when directed in the recipe.

Do not change the total amount of dry ingredients called for by the recipe.  Let’s way that your recipe uses 2C flour, and you want to add oats to the dough.  To do that, you will need to cut back the flour by the same WEIGHT as the oats that you add.  Dry ingredients are most accurately measured by weight, not by volume.  (an easy rule of thumb here—3C of flour weighs 1 pound).

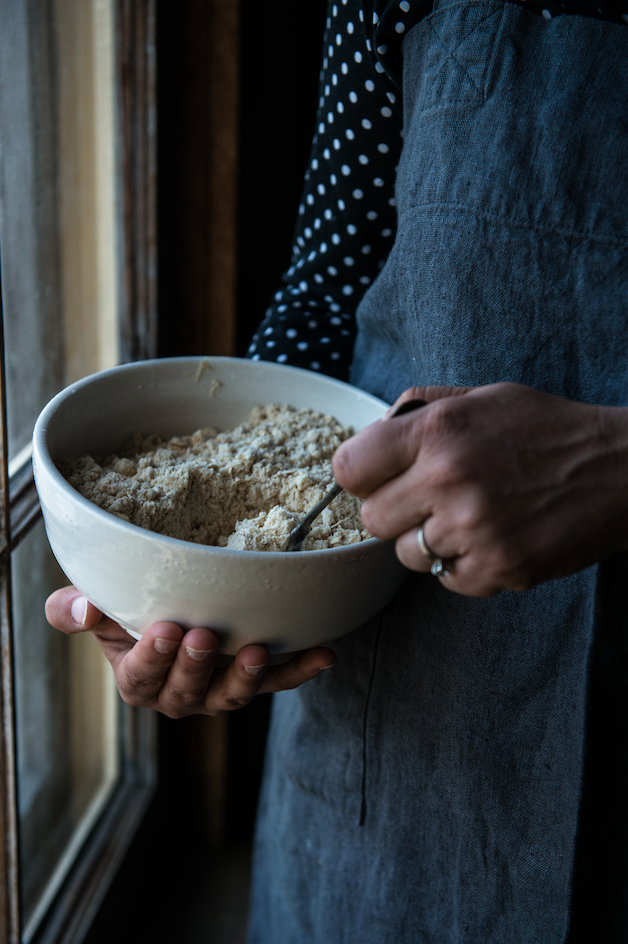
Different ingredients get added at different stages in the scone making process.  You have three basic stages of scone making—measuring the dry ingredients into the bowl—cutting in the butter, and then blending in the liquids to create your dough.  In general, dried spices get added to the flour mix, before cutting in the butter.  Nuts and dried fruits can be added after the butter is cut in, but before the liquid is added.  Fresh or frozen fruits are best folded into the dough gently after the dough is made, but before you cut the scones (see side bar for specifics).  I learned this one the hard way—I was making blueberry scones for the first time, and put the berries into the bowl after the butter was cut in—then tried stirring in the buttermilk.  Immediately the berries began to crush and spread blue juice and goo throughout the dough.  That batch of scones has been immortalized in our family history as the day mom created Smurf scones!


Some of the easiest ways to change the scone flavor include:

Swapping brown sugar or a combination of white and brown sugar for the granulated sugar usually indicated in the recipe. 

Adding dried fruits or nuts to the dough.  Classic is always a winner.  If you want to kick the results up a notch, toast the nuts before adding them to the flour and butter mixture.  It not only intensifies the flavor but it helps maintain the texture and crunch during the baking process.  

Enhance the flavor with spices, extracts, or citrus zests.  Spices such as cinnamon, ginger, cloves, allspice, and nutmeg are natural add-ins, depending upon the flavor you are trying to produce.  Citrus zests will also flavor the dough, as well as enhance the flavor of many different fruits you might be choosing to add (think blueberry lemon or cranberry orange).  Dry spices can be added before the butter is cut in; zest should be added after cutting in the butter, but before adding the liquid.  If you are adding extracts, stir the extract into the liquid ingredients before adding them to the bowl.

Add fresh or frozen fruits to the dough.  If you are using frozen fruit, do NOT thaw the fruit before adding it to the dough.   In general, soft fruits and berries are best added gently by hand once the dough is completely formed, but before you cut the scones.  Roasted apples are an exception and can be added to the butter/flour mixture, before the liquid is added.  

Fruit or vegetable purees can be substituted for much of the liquid ingredients.  Remember to keep the total volume of liquid equal to the amount of liquid called for in the recipe—otherwise you will end up with a very soupy dough.  Substituting purees for some of the liquid ingredients works particularly well in recipes that call for cold butter to be cut into the flour mixture, and then a liquid such as buttermilk, milk, or cream to be added. I would be cautious about this substitution when there is no butter in your ingredient list.  In this case, the recipe likely calls for heavy cream, and the cream is then the sole source of fat for the baked scone.


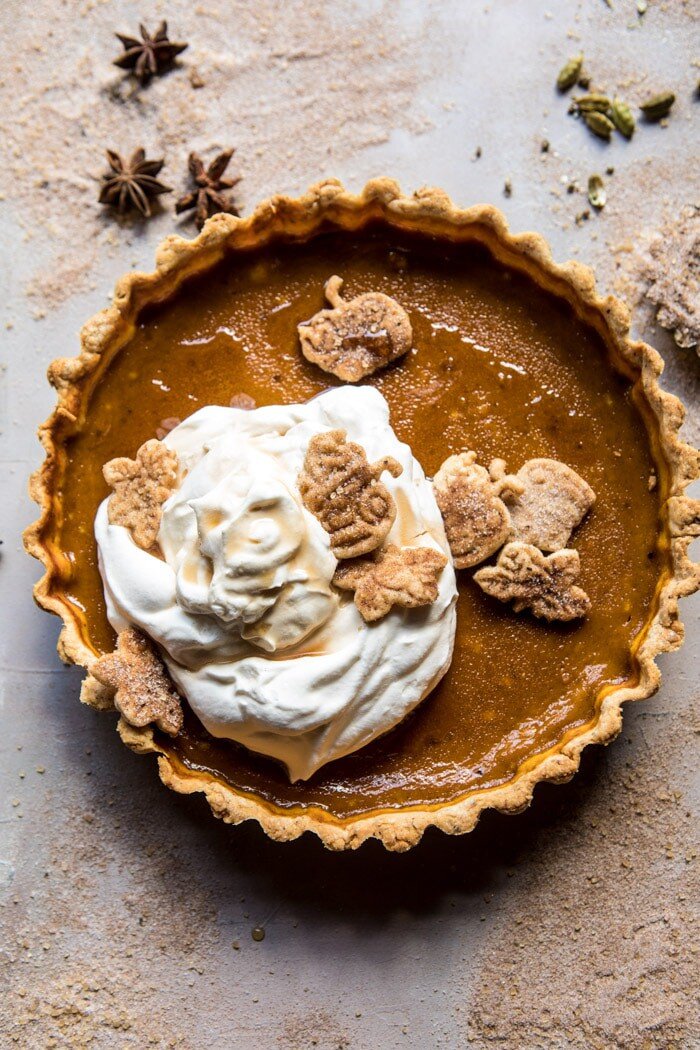
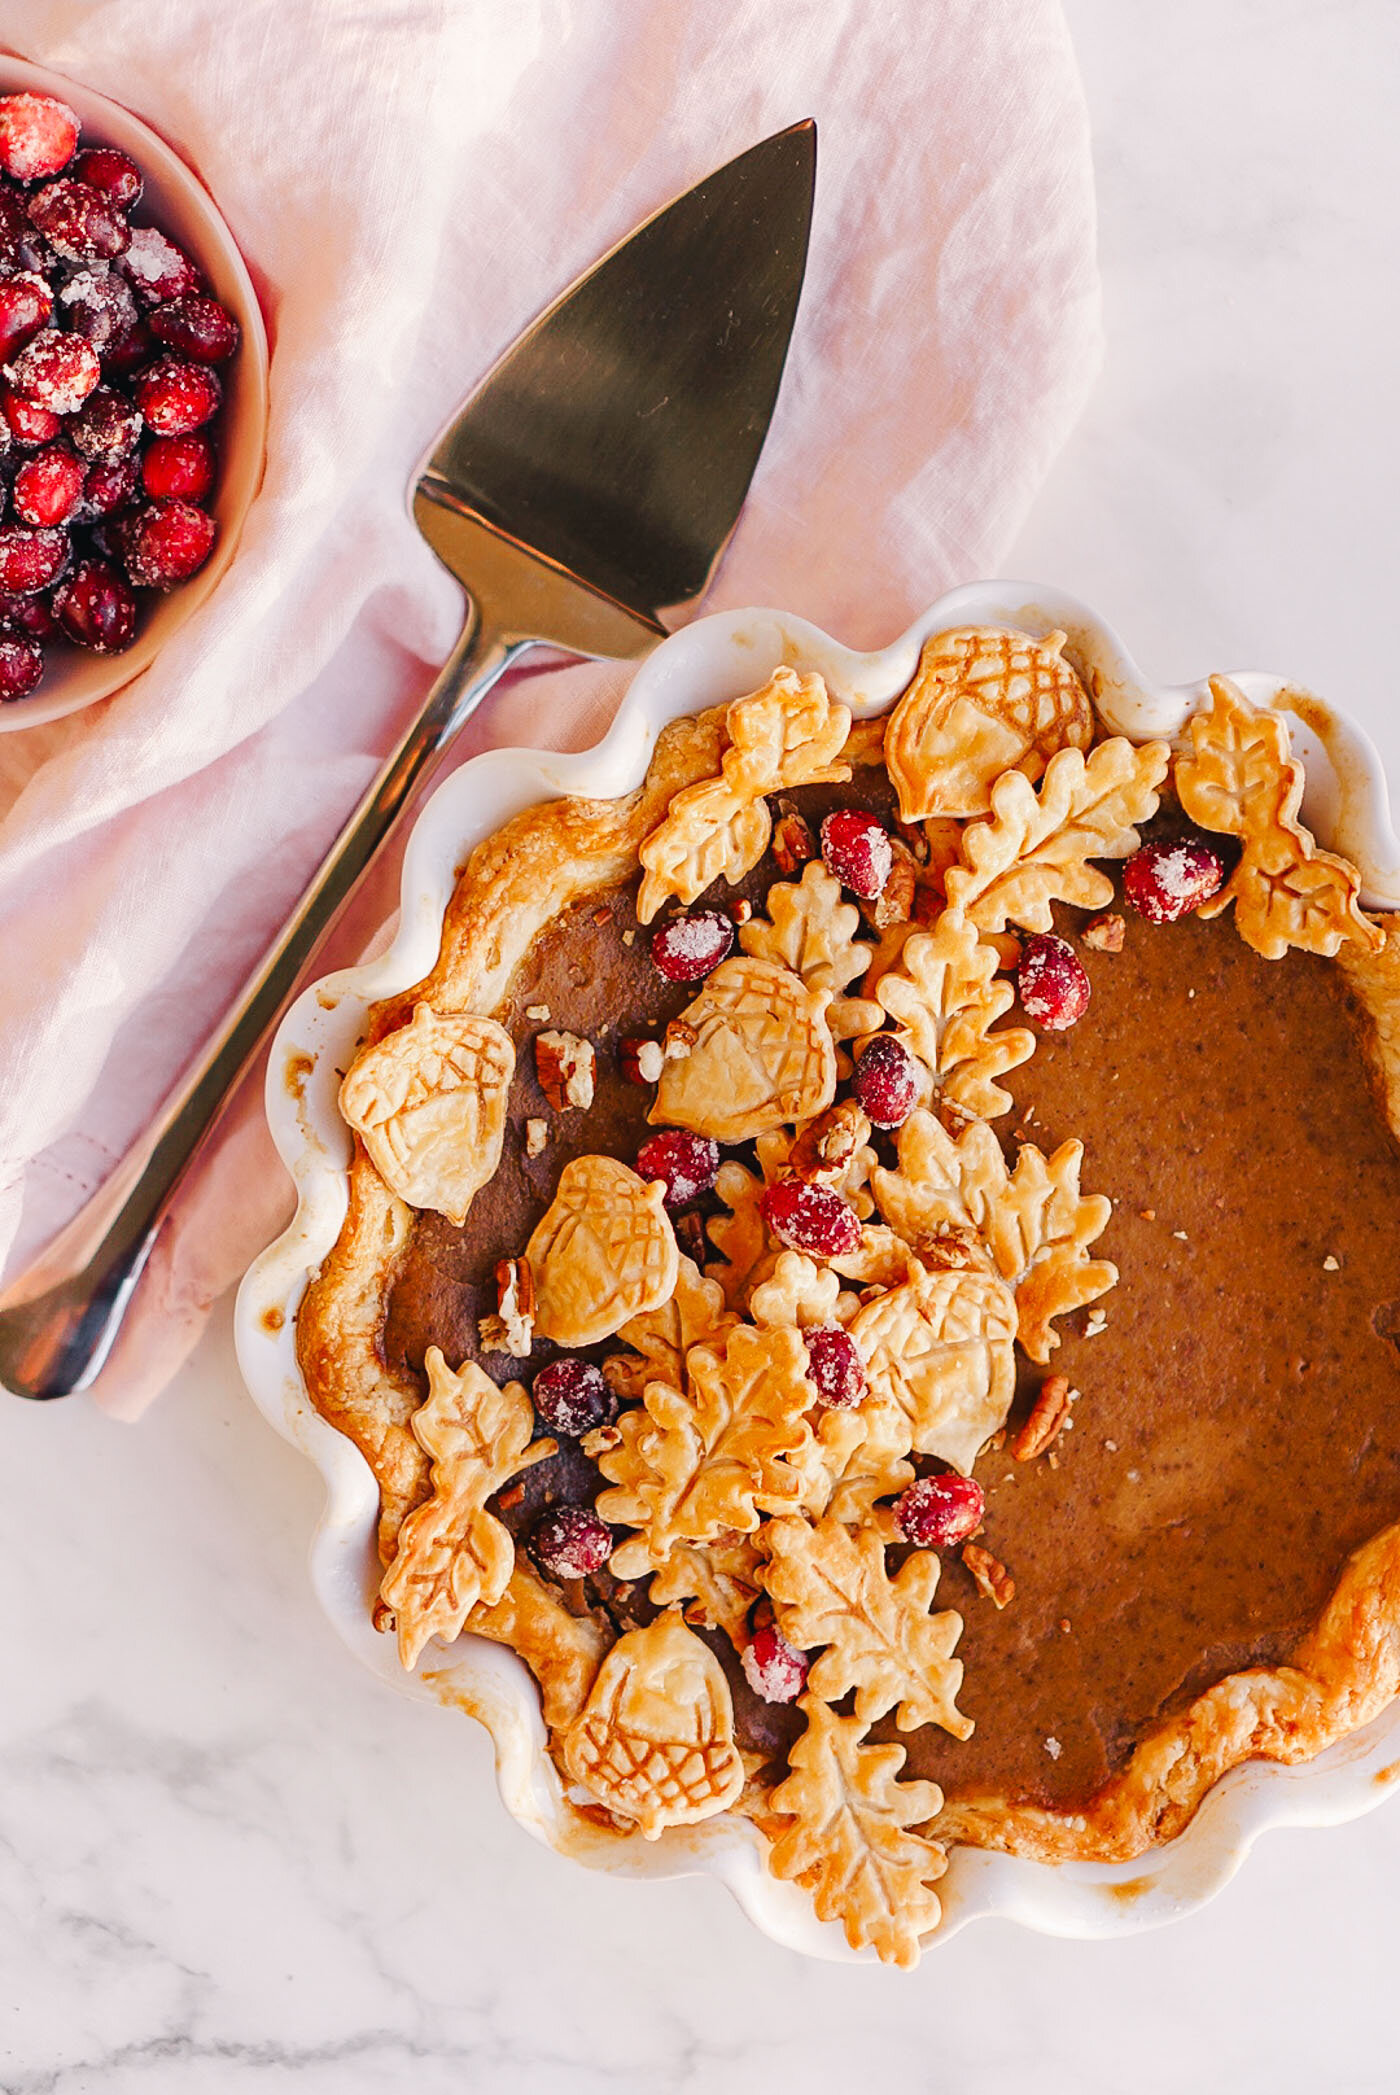
During the holiday season, I like to take my plain scones and dress them up with holiday flavors.  My current favorites include Cranberry Gorgonzola , Apple Ginger, and of course Pumpkin Spice.


Pumpkin Spice Scones—Using your favorite plain base scone recipe (see below if you are still searching for the perfect scone recipe) or mix, make the following additions/substitutions:

  1. Add 1T pumpkin pie spice to the dry ingredients, and stir to distribute evenly

  2. Cut in butter as directed

  3. Substitute half to 2/3 of the total liquid called for in the recipe with pumpkin puree (NOT pie filling!).  Blend the puree into the milk/cream/buttermilk, and then follow the recipe as directed to create your dough.

  4. Pat out to a thickness of ¾-1”, cut into desired shape.  Bake immediately or freeze dough for baking later.

* The baking time might be extended by a few minutes, since the pumpkin puree adds to the density of the dough.

Cranberry Gorgonzola Scones —These scones smell absolutely wonderful in the oven, and are a perfect addition to a lunch or supper of soup and salad.  Again, start with your favorite base recipe or mix.  

  1. Once the butter has been cut in, add 4-5 oz (a small container from the grocery store) crumbled gorgonzola cheese.  

  2. Add milk/cream/buttermilk as directed and form your dough.  

  3. Pat out the dough on a floured surface and add a generous handful of fresh or frozen cranberries to the top of the dough.  

  4. Fold the dough over onto itself 2-3 times (again, do not overwork or knead) and re-pat the dough to the desired thickness (I recommend ¾-1” thick). 

  5. Cut into desired shapes and bake immediately or freeze dough to bake later.


Apple Ginger Scones—these are a little trickier to create, but are well worth the effort. 

You will need: 

  1. 1C roasted apple chunks (peel, core and dice 2-3 baking apples.  Place on cookie sheet and bake at 375 until fork tender—15-20 minutes).  Cool completely before using.)

  2. 1T Powdered Ginger

  3. 1/2C unsweetened applesauce

  4. Molasses (2T or so)

  5. 1/2t cinnamon

  6. 1/2t allspice

  7. Brown Sugar

(When I make these, I actually usually start with our (Victorian House Scones) Gingerbread Scone Mix.) 

If you are starting with a plain base recipe

  1. Substitute brown sugar for the white sugar.  

  2. Add 1 heaping T of powdered ginger, 1/2t cinnamon, and 1/2t allspice to the flour and other dry ingredients.  Stir to distribute spices evenly.

  3. Cut in the butter as directed by the recipe.  Add the cooled roasted apples to the mix and stir to distribute throughout the mixture.

  4. Blend together 2T molasses and 1/2C unsweetened applesauce, then bring up to 1C (or total volume) called for in the recipe.  Stir into the flour/apple/butter mixture to form the dough.  (if less total liquid is called for in the recipe, reduce the molasses and applesauce proportionately).

Turn out onto a floured board, pat to desired thickness, and cut into desired size and shape.  Bake immediately or freeze the dough to bake later.


Scone Making Basics Sidebar

Use cold (or even frozen) butter when making scones.  A very easy way to cut in icy cold butter is to first grate it with a cheese grater.  Wrap it lightly and freeze for 15-20 minutes (while you assemble the rest of the ingredients).  When you are ready to use the butter, drop it into the bowl, and cut it in with a pastry cutter, or mixer or food processor.  It will go in very quickly, and leave perfect little nubbins of butter scattered throughout the mixture.


Handle the dough very minimally.  The less the dough is handled and kneaded, the lighter it will be.  I once saw a demonstration where the woman was incorporating the liquid into the butter/flour mixture with her hands—or rather, with just ONE hand.  When asked why, her comment was that this way she would have scones, not STONES.  Using both hands together would result in the dough being kneaded and overworked thus yielding tough and dry scones.


To add fresh or frozen fruit to the dough, pat the dough into a circle as if you were getting ready to cut your scones.  Put a generous handful of fruit such as blueberries on top of the dough.  Gently fold the dough over the fruit 2-3 times, and then gently re-form the circle.  This process will work the berries into the center of the dough.  Take care not to overwork or knead the dough.  Reform the circle and cut the scones into desired shape.  


Links to some basic scone recipes or mixes

www.elmwoodinn.com/recipes/elmwood_scones.html  (offered with permission of Bruce and Shelly Richardson of Elmwood Inn Fine Teas)

www.kingarthurflour.com/recipes/scones-recipe

(Each of the above recipes call for eggs.  Not all scone recipes need eggs—our mix uses no eggs, and buttermilk rather than heavy cream or half and half.)  Ultimately your favorite scone recipe or mix is going to be what you believe tastes the best!


Gooey Butter Cake

Ben Ashby

There aren’t many recipes as easy as this one. A very humble dish, that becomes a non-complicated go to. This gooey butter cake recipe is perfect to make as a snack or a dessert and will likely remind you of a chess bar, but is much easier to make.

RECIPE

Preheat oven to 350 and grease a 13x9 baking dish.

Crust: 1 box yellow cake mix, one beaten egg, 1 stick melted oleo. Combine ingredients to form a dense dough. Spread along bottom and sides of a well greased baking dish.

Filling: 1 pound powdered sugar, 2 beaten eggs, 1 block softened cream cheese, 2 teaspoons good vanilla.. Whip together until fluffy. Pour over crust. Bake for 30 minutes or until golden. An over-baked cake will be less gooey than you’d like, but still delicious.

Fried Apple Pies (with Canned Biscuits)

Ben Ashby

I hadn’t had one of these in over twenty years. As I thought about them the week before I was convinced they had to have been something I dreamt, not a long forgotten relic of my childhood, but the more I workshopped this recipe in my head I realized it was a dessert and a scene I had had many times before. When I was a child my aunt would make fried apple pies. I remember her making them here, in her brother’s kitchen rather than her own. Yesterday I made them based on those nearly forgotten memories. Part of me felt wrong in making them on the counter by the sink rather than to the right of the stove. The memory in my mind of Aunt June making them here in this kitchen was her standing in front of the stove, me on a stool beside her by the door into the then dining room. Each of the canned biscuits, Grands, the buttery kind were rolled out as thin as possible, and apples were spooned on. The apples back then would have come from the orchard out back, the orchard that the tornado carried away a couple years ago. She would spice the apples with cinnamon and sugar, and most likely that canned mix called Apple Pie Spice. A fork, taken from the same drawer I took one today would have been used to crimp the edges to hold the apples in. Then in a cast iron skillet, perhaps the very one I used today would be filled with a half inch of oil, heated, and the pies each placed in and fried until golden brown. The pies removed from the skillet and laid to rest on a paper towel lined plate. The same plate surely still in my cabinet next to the window. Watching the pies fry today, in that skillet, in this kitchen, on one of the final fleeting days of fall felt like a walk into the past, it felt good, it felt like a place one should visit whenever one can.

FRIED APPLE PIES (WITH CANNED BISCUITS)

1 Can Grands Biscuits

3 apples, variety doesn’t matter) cooked and seasoned in a baked apple fashion

For these photos I used our apple pie jam as filling as a substitute for the baked apples. It works just as well, especially if apples aren’t on hand and the jam is.

For the recipe I would recommend pealing and slicing your apples into thin wedges. Add to a small pot on medium heat. Add about two inches of water, 1/2 cup sugar and whatever cinnamon/nutmeg/apple pie spice combination you’d like. Allow to cook until the apples are tender.

For the dough take each biscuit and roll as thin as possible. Keep the circular shape. Once rolled spoon in the apple filling on one side of the dough, the other side will be folded over. Leave 1/4 to 1/2 inch edge to allow for crimping.

Fold the other side of the dough over to create a half circle. Using a fork crimp (press down) the edges all the way around to bond the two edges together.

In about 1/2 inch of oil in a skillet over medium heat fry your apple pies until golden brown on each side. Remove to a paper towel lined plate to drain excess oil and to cool.

Serve warm. Can keep in the fridge and be reheated for two to three days.

Easy Sweetened Condensed Milk 3 Ingredient Microwave 3 Minute Fudge

Ben Ashby

This is one of those recipes that really couldn’t be more simple. You have without a doubt had this simple form of fudge before. It isn’t old fashioned fudge that is an absolute art form, but if you’re in a hurry this recipe feels like equal parts instant gratification and a nostalgic throwback. You can use milk chocolate or dark chocolate chips for this recipe, and likely could use peanut butter chips or white chocolate chips, but we prefer the classic semisweet.

THE RECIPE:

2 cups Semi-Sweet Chocolate Morsels

1 can (14 ounces) NESTLÉ LA LECHERA Sweetened Condensed Milk

1 teaspoon vanilla extract

Line an 8x8 baking pan with foil or heavily grease with butter. Combine morsels and sweetened condensed milk in large, microwave-safe dish. Microwave for 1 minute; stir until smooth. Stir in vanilla extract. Spread into prepared baking pan. Refrigerate for 2 hours. Lift from pan. Cut into pieces. Store in refrigerator.

6 Sensational Soups to Save

Katie Westerfield

6 Sensational Soups to Save

Pin for later (or tonight.)

Not sure I’ve ever met a soup I didn’t like. It’s definitely a comfort food I don’t want to live without, so when I say this list is bringing me joy, you know it’s real. Here are some sensational soups you should check out. We’ll understand if they’re your new snow day go-to.

Spoon Fork Bacon Website

Spoon Fork Bacon Website

Creamy Tortellini, Sausage and Spinach Soup

Spoon Fork Bacon

Loaded with all the good things. Truly, this soup checks off many of my favorite foods. Grabbing my biggest spoon and coziest blanket for this one.

Platings + Pairings Instagram

Platings + Pairings Instagram

Hungarian Mushroom Soup with Fresh Dill

Platings + Pairings

Creamy and packed with flavor, the basis of a perfect soup. Unique but worth whipping up to share with friends or keep to yourself.

Zestful Kitchen Website

Zestful Kitchen Website

Creamy Broccoli Soup with Cheesy “Everything” Spiced Croutons

Zestful Kitchen

You read the name, do you need any more convincing? Over here wishing these bowls were currently in front of me. Comfort and joy, indeed.

The Lemon Apron Website

The Lemon Apron Website

Parsnip, Rosemary and Mixed Nuts Soup

The Lemon Apron

A combination that just seems to work. A new, fun, and delicious way to use up your in season veggies. Give it a try and let us know what you think.

Kim’s Cravings Website

Kim’s Cravings Website

Vegetable Beef Soup

Kim’s Cravings

For those that crave a hearty soup, hello. Something about vegetable soup is so nostalgic and cozy. Paired with a filling beef and we’re talking next level. And I’m okay with that.

The Cookie Rookie Instagram

The Cookie Rookie Instagram

Creamy Chicken Soup

The Cookie Rookie

When you just need a little pick me up. A family recipe to bring in to your life and never let go. A classic. A strong yes.

Not Your Mama’s Pumpkin Pie

Katie Westerfield

Not Your Mama’s Pumpkin Pie

No offense.

The Thanksgiving take over. These unique twists on an autumn staple are well worth a double-take. Untraditional, maybe, but this year is all about the “new normal.” So let us know, which recipe are you adding to the menu?

Chai Pumpkin Pie with Maple Whipped Cream

Half Baked Harvest

Can anyone else just smell the goodness in this image? It’s got me day dreaming over here, friends! One large slice of pie with two scoops whipped cream, please and thank you.

Pumpkin Meringue Pie

Preppy Kitchen

Mile high meringue for the Thanksgiving win. Also, spoiler, this sweet treat does include some bourbon because, I mean, why not?

Savory Pumpkin Pie with Whole Grain Crust, Mushrooms, and Toasted Hazelnuts

The Hungry Apron

Savory as pie. Is that a thing? I love how different this dish is. There is something so warm and cozy about it. And honestly, I’ll try anything by The Hungry Apron once.

Pumpkin & Caramel Pie

The Kitchen McCabe

Name a better duo. I don’t think you can go wrong here. Two fall must-haves (read needs) coming together for a very perfect Thanksgiving finale.

Apple Pumpkin Pie with Maple Whipped Cream

Baran Bakery

Another maple whipped cream and I just feel really thankful for that. Plus the touch of Americana apple. Very homey and sounds like a second plate.

Maple Pumpkin Pie

Going for Grace

Maple pumpkin just feels like autumn, don’t fight me on this. Sugar and spice and everything nice has never been so true. Try it for yourself.

Keep up with all our stories by following along on Instagram and subscribing to our newsletter.

Fall Drinks from Cozy to Cocktail

Katie Westerfield

Fall Drinks from Cozy to Cocktail

Cheers to the weekend.

It’s the coziest time of the year and we’re celebrating accordingly. Here are all the fall drinks you need to add to your “must try” list. Just trust us.

Eva Kosmas Flores Website

Eva Kosmas Flores Website

Mulled Wine

Eva Kosmas Flores

A classic coming from the kitchen of Eva, so you know it’s a must. Mulled wine is ultimate cozy and all things tasty so hop on this recipe to savor all season and in to winter.

The Ginger with Spice Instagram

The Ginger with Spice Instagram

Apple Caramel Latte Macchiato

Ginger with Spice

What’s not to like? Four very delicious things come together as one and we’re not mad about it. Move over, PSL. (yeah, I said it.)

Platings + Pairings Website

Platings + Pairings Website

Apple Cider Cocktail

Platings +Pairings

Apple cider but take it up a notch. 2020’s Thanksgiving dinner just got a little sweeter with this perfect cocktail on deck.

Half Baked Harvest Instagram

Half Baked Harvest Instagram

The Black Widow Smash

Half Baked Harvest

Cocktail aesthetics 10/10. So pretty. So cozy. So spooky. The crowd pleaser you didn’t know you needed just in time for your Halloween celebrations.

Inspired By Charm Instagram

Pumpkin Old Fashioned

Inspired By Charm

We’re still showing all the pumpkin love, y’all. Can you blame us? This collab is checking off all the boxes.

Spoon Fork Bacon

Hot and Creamy Butterbeer

Spoon Fork Bacon

Fall dreams in a cup, please and thank you. Rich, warm, and cuddle up with a good book worthy. Let’s be honest, that’s what we’re looking for.

For more stories and favorites like these, make sure you’re subscribed to our newsletter and following along on Instagram.

Hunt and Gather

Ben Ashby

Screen Shot 2020-10-29 at 1.13.04 PM.png

GATHERING OF THE SEASONS. A trio of apple desserts, a fabulous fall arragement, and one stellar location come together to create a fete for the fall. Designer Evan G. Cooper creates a memorable fall gathering perfect for the southerner or the rustic lover in us all. This story is from October 2012.


Screen Shot 2020-10-29 at 1.12.43 PM.png

Apple Pie

8 sweet apples, peeled, sliced, and cored
1 cup sugar
2 teaspoons ground cinnamon, or to taste

2 1/2 tablespoons all-purpose flour

1 teaspoon ground nutmeg
Pinch of salt
2 tablespoons butter

2 unbaked pie shells

Preheat oven to 400 degrees.
In a mixing bowl, combine sugar, cinnamon, flour, nutmeg, and salt; mix thoroughly. Pour the spice mix over

the apples and stir until the apples are coated. Line one crust in a 9 inch deep dish pie pan. Place the apples in the pie crust. Dot the apple filling with butter. Cut the second pie crust into strips. Creating a lattice pattern starting from the center cover the pie with the strips. Press the crust down gently and cut four slits in the top crust to allow steam to escape while the pie bakes Bake in the preheated oven one hour or until the crust is golden brown. Check the pie after the first

30 minutes of cooking: if the crust is already browned reduce the heat to 350 degrees to allow the apples to cook without the crust burning.


Screen+Shot+2020-10-29+at+1.12.23+PM.jpg

Red’s Apple & Cheese Casserole

2-3 lbs fresh apples, cored, peeled, and sliced

1 1/2 cups water
3/4 cup sugar
1 1/2 pounds of sharp cheddar

4 cups sugar

3/4 cup melted butter

3 cups flour
2 cups milk

Combine 1st 3 ingredients in skillet, cook on medium-low heat until apples are semi tender (they will continue to cook in casserole). In bowl combine remaining ingredients. Drain cooked apples, stir into bowl, and then pour into greased casserole dish. Cook at 300 degrees until firm and golden.


Screen Shot 2020-10-29 at 1.13.20 PM.png

Apple Filled Puff Pastry

1 package puff pastry
3 apples, peeled cored, and sliced 1/2 cup packed brown sugar
3 teaspoons flour
3/4 teaspoon lemon juice
1 teaspoon cinnamon
1 teaspoon nutmeg
1 beaten egg

Thaw puff pastry. Heat oven to 350°F. Peel, core and chop apples up coarsely.. Combine apples with sugar, flour, lemon juice, cinnamon and nutmeg. Flour surface lightly and cut pastry sheet into nine 3x3 squares. Place approximately 1/4 cup apple mixture on each square and brush edge with beaten egg. Place second pastry square on the top of the already filled pastry to form a pocket. Press down the border with fingers to seal and then press with fork to decorate the edges. Cut several vents into each pastry. Place on well greased baking sheet and give each one an egg wash. Bake for approximately 20 minutes or until golden.


Screen Shot 2020-10-29 at 1.13.29 PM.png


Stylist: Evan G. Cooper/ Evan & Co.
Photographer: Nick Drollette
Venue: Emerald Mountain Equestrian Club
Assistants: Jonny Marsh, Rae Culver/ LeRae Events + Design Rentals: Brendle Rentals

Evan G. Cooper, is a stylist and floral designer with a knack for creating settings filled with southern charm. Rustic or regal matters not when it comes to making his designs full of rich, authentic details. His passion carries over into affections for photography, missions abroad and good ‘ole southern hospitality. He’s right at home in Montgomery, Ala- bama as owner of Evan & Co., an event and floral design company.

6 Pumpkin Recipes You Need Right Now

Katie Westerfield

6 Pumpkin Recipes You Need Right Now

And every fall from now on.

Any excuse to whip out some pumpkin puree I’m here for. These recipes aren’t your momma’s pumpkin pie but still give you that cozy, homey vibe you dream of this time of year. From sweet to savory, your next go-to Autumn recipe is right here. Keep reading for the 6 pumpkin recipes you need in your life.

Pumpkin Mascarpone Pancakes

Eva Kosmas Flores | Adventures in Cooking

Eva Kosmas Flores | Adventures in Cooking

The Kitchen McCabe

The Kitchen McCabe

Platings + Pairings

Platings + Pairings

The Hungry Apron

The Hungry Apron

Two Cups Flour

Two Cups Flour

Twigg Studios

Twigg Studios

Love these recipes and want to see more favorites? Be sure to follow us on Instagram and subscribe to our newsletter to keep in touch.

 Jen’s Banana Bread 

Ben Ashby

 Jen’s Banana Bread 

A timeless recipe that feels more like a cake than a bread.

This recipe came to me in the very best way…in 2002 I was sitting at my friend Lori Gibbons’s kitchen table, and she put this in front of me…warm, with a cup of tea. I was smitten. She had tweaked the recipe and shared it. I still have the Post-it stuck in the inside cover of my cookbook from that fateful day when she rattled off the recipe to me. All these years later, the first bite out of the oven is still as perfect.


It’s the best of the breads out there…and it adapts well to gluten-free flour. I bake mine in an old iron skillet or a cast Bundt pan. 


2 sticks + 3 Tbsp butter* 

3 cups flour

2 tsp baking soda

2 tsp baking powder 

½ tsp salt

3 super ripe medium bananas (MUST BE previously frozen and thawed)

4 tsp lemon juice

3 tsp pure vanilla extract

2 cups sugar

2 large eggs

1 cup chocolate chips


1. Place rack in center of oven; heat oven to 350 degrees. 

2. Drop 3 Tbsp butter into skillet, set in oven to melt as oven heats (you want it very hot and bubbly by the time you place mixed ingredients in your skillet).

3. Whisk flour, baking soda, baking powder; salt in separate bowl; set aside.

4. In stand mixer or with handheld blender, beat butter sticks and thawed bananas through with lemon juice and vanilla (it will be lumpy and bumpy, that’s ok, life is sometimes…).

5. Add sugar; beat until as creamy as you can, it will still have lumps (relax, life isn’t perfect…).

6. Add eggs, 1 at a time and beat through; add chocolate chips; mix. 

7. Add dry ingredients, mix lightly.

8. Plop ½ the batter in center of skillet (use a 10-12” adjust cooking time as needed).

9. Pop in oven; bake for 1 hour or until batter is pulled back from edges of pan and fork comes out clean. Let cool on wire rack; flip out of pan onto a pretty plate to serve.


NOTES: This recipe makes 2 batches so get yourself a 2nd skillet or make 1 then the next; or save batter for the next day. Do not split the recipe, it’s just not as good.

I heart “Kerrygold” Irish butter…use the best quality you can find and stock up if it’s on sale, you can use previously frozen butter for this recipe.

In Like a Lion Quiche

Ben Ashby

IN LIKE A LION QUICHE

FROM THE KITCHEN OF KATRINA OHSTROM

INGREDIENTS

1 1/2 cups goat’s milk
4 eggs
2 springs rosemary
1 1/2 cups goats cheddar
1/2 large onion
2 fistfulls arugula
1 bulb garlic
8 spears asparagus
1 tablespoon butter
Salt + pepper
1 pie crust

INSTRUCTIONS

Prep: preheat oven 375, chop rosemary, onion, garlic, grate cheddar. Roll out dough 1/4” thick, sprinkle 1/2 of the rosemary on top, gently roll into surface of dough. Place dough in pie plate, sprinkle 1/4 of the goat’s cheddar into the center, blind bake 5-10 minutes, this will prevent the bottom of the crust from getting soggy.

While crust is blind baking, melt butter in skillet, saute onions and garlic, remove from skillet and saute asparagus and beat together eggs, goat’s milk salt and pepper. Remove crust from oven, add arugula, onions, garlic, pour in egg mixture and top with the remainder of the cheddar and rosemary

Arrange asparagus on top. Bake until crust is golden brown and quiche is set in the middle, approx 40 minutes. Let stand at least an hour before serving. If preparing the night before, cool and refrigerate and then bring to room temp before serving.

PHOTOGRAPHY & RECIPE: KATRINA OHSTROM

— ohstromphoto.com

Old Fashioned Orange Juice Cake

Ben Ashby

Orange Juice Cake

This recipe was a staple for every church potluck, funeral dinner, or just a go-to everyday cake. It’s super moist like pound cake.

1 box yellow cake mix

1 box instant vanilla pudding

4 eggs

½ cup vegetable oil

1 cup orange juice

¼ cup brown sugar 

¼ cup pecans, chopped

GLAZE

½ cup butter

1 cup sugar

¼ cup orange juice

1. Preheat oven to 325 degrees. Mix cake mix, pudding mix, eggs, oil, and orange juice together. 

2. Grease Bundt pan. Spread brown sugar and chopped nuts in the bottom. 

3. Pour batter in pan; bake 35–40 minutes. 

4. For glaze, melt butter in saucepan, add sugar, orange juice; bring to boil, stirring constantly. 

5. After removing cake from oven, pour glaze on cake; cool 15–20 minutes; then invert onto plate.

A Cast Iron Primer

Ben Ashby

The Little Black Dress of the Kitchen

By: Jen O’Connor of Earth Angels Studios

Cast iron is like one of those ancient species, so ideally suited to its environment, that its need to evolve was forgone forever ago. It is one of the most versatile objects in any kitchen and can be used for everything from frying the perfect egg to baking a cake. Cast iron can take the heat on stovetop or oven, transferring from one to the other with aplomb! So, if you have a cast iron skillet, you could use it, and it would keep coming back from more. It just doesn't wear out; indeed many of them in active service have been on duty for more than 100 years. So, if you have a cast iron skillet in your kitchen, and you are not pressing this dedicated workhorse into service, you should be wondering just why not?


Cooking is a learning process—an art form that constantly absorbs the new. So many cooks are forever on the prowl for the new gadget, the more convenient appliance or a utensil that will make some task easier. In the hunt for the new, there are those among us that might just be guilty of setting aside a three or four pound cast iron pot for something more lightweight or easier to store. In the era of super non-stick surfaces and the age of anodized aluminum, cast iron may have been overlooked for commercially promoted brands and sleeker lines of cookware promising efficient and specialized attributes.

But, like all truly beautiful things, cast iron feels no threat. It has no need to waver from its perfection, and that little skillet will wait in quiet confidence for renewed appreciation by the cook who decides to use it. Fortunately for cast iron and its devotees, there's been a recent celebration of its merits among those who pursue slow living. In its versatility and simple charms, it appeals to cooks who treasure its humble beauty. Cast iron is affordable and versatile…it’s practical and durable…and the art of slow living celebrates these qualities. Like the little black dress that hangs in your closet just perfect for any occasion, cast iron stands at the ready to save the day by simply doing what it does best…cook like nothing else in your kitchen! 

Cooks love cast iron for what it does for them with regard to handling temperature. It does not heat evenly, but once it's hot, it stays hot and will cook something evenly by retaining the heat more consistently. As such, cast iron lends itself to baking and was fashioned into inset ovens as well as the tightly lidded pot—or Dutch oven—that we picture baking biscuits over a campfire. Conversely, on the stovetop, cast iron sears meats in a way no other cookware can.

Origins of the Alloy….

Cast iron has been around forever…well, almost forever. There are archaeological finds that date cast iron to 400 AD in China where the alloy was first made and used in the production of agricultural tools, architectural ornaments and pagodas, and some weapons. The knowledge of this metallurgy production, along with cast iron objects and tools, slowly made their way from Asia to other regions along trade routes. By the 1400s, cast iron was well ensconced as an alloy in Western Europe and was used widely in the production of household goods and weapons. Some cooking vessels were used in the early years of cast iron production, but it wasn’t until the 1700s that the cast iron “Dutch Oven” became the ubiquitous cooking pot.

That said, it's safe to say that in the past 300 years many kitchens had a cast iron skillet and a cast iron Dutch oven to manage the meals of the day and perhaps a cast iron oven—set into a chimney—for the baking. When the Europeans brought cast iron to the Americas during the colonization, the pots populated the hearths and homes of the early settlers and took them westward working their way one meal at a time. Cast iron has always been decidedly at home in the US. Over time manufacturers have added a glass enamel lining and coating to cast iron, and also made cast steel, but cast iron is much cheaper and its proletarian appeal warrants celebration!

Using cast iron…


Cast iron deserves a spot in everyone’s cabinets. And while it might get moved to the back of the shelf, its form and function will never go out of style. It’s durable—and it’s practically indestructible—but it asks for a few simple things to assure its functionality. After use, it should be washed with mild soapy water and dried, THOROUGHLY. If you really want it to love you forever, give it a quick swipe with oil on a paper towel and pop the pan back in a hot oven to dry it completely or heat it for just a bit on a burner so the oil will not go rancid. This preserves the seasoning.


You can’t put a cashmere sweater in the washing machine, and you can't put cast iron in the dishwasher. Period. If you do, the seasoning will be gone, and while you can "re-season" it, this can easily be avoided.

Find these US-made vintage lovelies for your kitchen…

Griswold and Wagner are the most sought after of the manufacturers of cast iron cookware. Griswold manufactured in Erie, PA from 1865–1957, and Wagner in Sidney, OH from 1891–1999, but the companies’ success waned in the late 1940s and continued to decline after these family businesses were bought and subsumed into a larger housewares brand. Griswold is usually marked, and it's easy to spot, with “Erie” or the well-known logo featuring a blocky cross in a circle logo on the bottom of pots. Wagner used a variety of logos—and sometimes none at all—so its provenance is more difficult to document. Pre-1890s cast iron may have what is called “gate marks” on the bottom—this slash mark is a remnant of the casting process.

Lodge—a company, based in TN has been making cast iron—and cast stainless steel—since 1896. They're a great option if you prefer new to vintage, and since 2002 they've been selling "pre-seasoned" pans…a game-changer in their appeal and capacity for immediate use. If a cast iron pan is not seasoned, there is time and patience involved with imparting the seasoning to the surface so that the pan can be used and a natural non-stick coating develops with use.

Not-So-Soda Irish Soda Bread

Ben Ashby

Aunt Julie’s Not-So-Soda Irish Soda Bread

By: Jen O’Connor of Earth Angels Studios

I was raised in an Irish-American household, and the only thing I liked about Irish Soda Bread was the butter you got to put on top to make it palatable! This recipe comes from my husband's Aunt Julie Flaherty O'Connor, and it's the best stuff out there. Moist, easy to make…but back to moist… 

I used to call Aunt Julie every St. Patrick’s Day morning to get the recipe, not that I didn’t have it jotted in my mess of a cookbook, but it was an excuse to chat and celebrate the small joy of a recipe shared. And don’t tell anyone, but I make it with ¾ cup of chocolate chips instead of raisins if no one is looking…but here’s Aunt Julie’s, the classic version.

INGREDIENTS

5 cups flour

7½ tsp baking powder 

½–¾ cup sugar (depends on your taste)

1 box raisins 

1 can evaporated milk + water added to make 3 cups liquid

TOPPINGS

1 tsp cinnamon (to taste)

2 Tbsp sugar (to taste)

4 tsp butter

1. In large bowl mix dry ingredients, add raisins; mix them in by hand. Add liquid; mix. 

2. Place in greased cast iron fry pan (size 7 or 8 Griswold). Sprinkle top with cinnamon and sugar.

3. Bake at 325 degrees for 1 hour or until toothpick comes out clean. Brush top with butter while still warm.

Old Fashioned Chocolate Pie

Ben Ashby

Old Fashioned Chocolate Pie

Pie is probably my favorite dessert. Actually it is, it is without question my favorite dessert. Well, bread pudding is right up there with it. This recipe is a traditional chocolate pie, but it incredibly easy. It is perfect for any season. Pie really should be celebrated all year long.

A classic southern chocolate pie recipe just like your grandmother used to make. Perfect for the baptist potluck, a funeral dinner, or as a gift to a new neighbor. Pairs well with sweet tea, fire flies, and heirloom quilts.

1 cup sugar

3 tablespoons unsweetened cocoa 

4 tablespoons cornstarch

2 egg yolks

3/4 cup cream

1/4 cup water

1 teaspoon vanilla

2 tablespoons butter

Pre-Baked pie crust

Combine sugar, cocoa, cornstarch, egg yolks, cream and water in a saucepan, and cook until thick, stirring constantly. Remove from heat and add vanilla and butter. Stir well. Pour into a baked pie crust. Top with meringue.

Strawberry Rhubarb Pie Ice Cream Sandwiches

Ben Ashby

Strawberry Rhubarb Pie Ice Cream Sandwiches

FOR THE STRAWBERRY HAND PIE CRUST
3 cups flour
4 Tbsp granulated sugar
1 tsp cinnamon
½ tsp salt
½ tsp nutmeg
8 oz unsalted butter, cold
6–10 Tbsp ice water

1 egg

1 Tbsp milk

FOR THE STRAWBERRY HAND PIE FILLING
¾ lb strawberries, caps removed, cut into 1” slices
1 stalk rhubarb, chopped
3 Tbsp granulated sugar

FOR THE ICE CREAM
1½ cups strawberry ice cream

To Make the Crust 

1. Mix dry ingredients in large bowl. Grate butter over bowl on largest hole setting. Stop every 2 minutes to stir in grated butter bits (avoid 1 giant butter shard clump). 

2. Add water in small increments, stirring until all water is added. Knead dough 30 seconds to disperse moisture. 

NOTE: Grab handful of mixture; squeeze. If it sticks together when released, it’s fine. If it completely crumbles apart add 1–2 Tbsp water. Once dough holds its shape divide into 2 balls.

3. Preheat oven to 375 degrees. Lay sheet of parchment on flat working surface; lightly dust with flour. 

4. Place 1 dough ball on parchment, pat it to a rough oval shape a few inches thick. Lightly flour the top, lay another sheet of parchment on top, roll out dough to about ⅛” thick between sheets of parchment. Repeat with other ball (2 sheets of dough between parchment).

5. Line large baking sheet with parchment paper. Use 3” round cookie cutter to cut out bottoms of hand pies, place them on baking sheet with 2” inches space between. 

6. Use slotted spoon to put some sliced strawberry filling on top, leaving ¼” border around to seal crust.

7. Use 3½” round cookie cutter to cut tops of hand pies out of other sheet of dough. To seal, dip finger in water, trace around edge of bottom crust. Place larger dough circle on top, press edges to seal. 

8. Use fork to crimp edges, use knife to cut a few small holes in top to allow steam to escape. Repeat until you've made 12 hand pies.
9. Whisk together egg and milk; lightly brush on pies. Place them in oven, bake until golden brown about 40 minutes. Cool before assembling.

To Make the Filling 

1. Toss strawberries, rhubarb, sugar in medium bowl until combined. Empty mixture into small saucepan; bring to boil over medium-high heat. 

2. Reduce heat to low, simmer until strawberries have softened, some liquid has evaporated; 15–20 minutes. 

3. Remove from heat, set aside, cool to room temp.


To Prep the Ice Cream Centers 

1. Line ¼ cup measuring scoop with plastic wrap. Use spoon to scoop ice cream into measuring cup; compact it. 

2. Turn it onto tray lined with parchment paper, remove plastic wrap from top. Line cup with plastic wrap again; repeat until you have 6 mounds of ice cream. Place tray in freezer 1 hour.

To Assemble the Pies
When ready to serve, assemble by placing each ice cream disc in between 2 pies.

Cinnamon Hot Chocolate

Ben Ashby

Before we go any further there is one thing that I must confess, I have a huge sweet tooth. And I mean huge. However, if there was one flavor that I could ever love more than chocolate it would be cinnamon. And so, you can imagine my excitement when the two are combined. This hot cocoa is nothing short of delightful and is a great drink to sip on a cold winter evening. It will warm your bones, and liven your taste buds. 

Cinnamon Hot Chocolate

3 ounces semisweet chocolate

1 Tablespoon sugar

1 teaspoon ground cinnamon

2 cups milk

1/2 teaspoon vanilla

A few drops of almond extract

Whipped cream, chocolate shavings and cinnamon sticks for garnish.

Cut chocolate into pieces and place in blender or food processor. Add sugar and cinnamon. Cover and blend or process until finely ground. Cook and stir chocolate mixture and milk in a large saucepan over low heat about 10 minutes or until chocolate melts. Remove saucepan from heat; stir in vanilla and almond extract. Beat with a rotary beater until very frothy. Serve in mugs. Top with whipped cream, chocolate shavings and cinnamon sticks if desired. Makes about 4 (8-ounce) servings.

3 Easy Fall Recipes All Apple Lovers Will Adore

Ben Ashby

Apple Cake, Apple Pie, and Apple Cider -Oh My!

a.k.a. Fall Heaven

One of my favorite memories as a child is when we would take our annual trip to the orchard to pick out some pumpkins to carve, take a relaxing hayride, and eat apples literally any way possible. Apple cider, apple fritters, apple cake, apple muffins, apple butter, apple bread, apple pie, apple cider ice cream, apple crisps, caramel apples, candied apples, I think you get the idea. I wanted to share a few of my favorite apple recipes for you to make this fall that I am sure you’ll love. Also, though optional, I strongly encourage you to go find a local orchard to both support a local business but also make the memories like I had as a kid -you won’t regret it.

Apple Cider Cake

boxed spice cake mix, apple cider, melted butter, eggs

1. Start with a standard boxed spice cake mix. Follow the directions on the box, but substitute the water the box will call for with apple cider. Substitute the oil for melted butter. Use the amounts called for on the box.

2. I personally prefer to bake this cake in a Bundt pan. Sprinkle chopped walnuts or pecans in the bottom of the pan. Grease well before adding the batter.

3. Allow cake to cool before inverting on serving stand or plate.

4. Top cake with fresh whipped cream and chopped pecans.

5. Add pumpkin spice to your whipped cream for additional seasonal flair.

Iron Skillet Apple Pie

1 Tbsp molasses

1 Tbsp lemon juice

1 stick butter

1 cup brown sugar

2 pastry shells

8 peeled and sliced apples

2 tsp cinnamon

1 tsp nutmeg

½ tsp ginger

½ cup white sugar

1. In a large mixing bowl combine apples, spices, sugar, molasses, lemon juice, and ½ cup of brown sugar. Set aside to allow flavors to combine. The acid in the lemon juice will prevent the apples from browning.

2. Preheat oven to 350 degrees. Place ¾ stick of butter and remaining brown sugar in the skillet. Place in oven and heat until butter is melted.

3. Remove from oven and place one pie crust in the pan, atop the sugar and butter. Fill with apple mixture. Slice remaining butter and place on top.

4. Cover with second crust and slice vents into crust. Top with a dusting of cinnamon. Place in oven for one hour, or until apples appear tender when pricked.

NOTE: If crust is browning too quickly cover with aluminum foil.

Slow Cooker Apple Butter

12 apples sliced, 1 Tbsp cinnamon, ½ cup sugar (optional)

1. Place sliced apples, cinnamon, and sugar in a slow cooker and cook on high for 6 hours. Once apples are tender allow to cool.

2. Place in blender and blend until desired thickness.

3. Allow to cool; store in fridge for up to 2 weeks.